Markers are a great tool to enhance one’s sketches, professionals use markers to create quick and yet impressive sketches. They are faster and more convenient that any other medium, they dry quickly and work well on almost any surface.
Having said that marker produces quick and impressive sketches. There are many books that teaches the reader on how to colour using marker, for example Colour Drawing by Michael E. Doyle (book cover shown below) and also Marker Magic by Richard McGarry & Greg Madsen.
I’m not going to show you how to use marker pen to colour your sketches using the conventional way, its going to be the digitally done using Photoshop instead, the image below is an example of digitally coloured sketch using Photoshop, the best part is you are able to undo you mistakes.
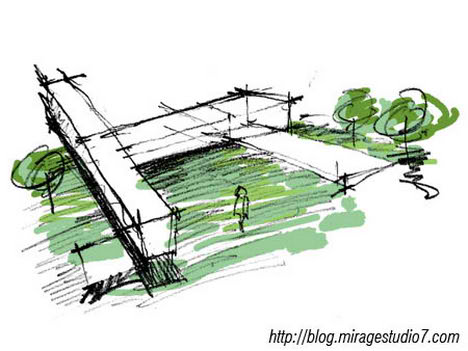
1) Scan your sketch into the comp; in this case, you can use the sketch below as a step by step tutorial. Right click and save it into your comp.
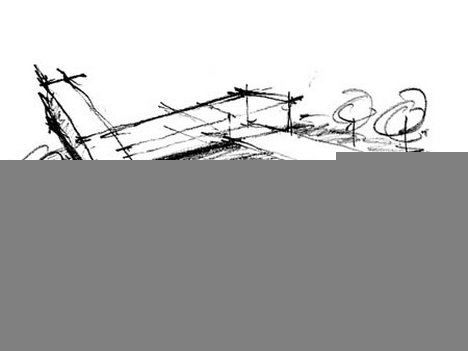
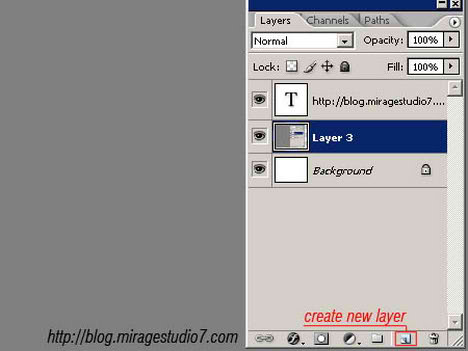
2) Load the sketches into your Photoshop, it should be your background layer and then click on the “create new layer” button to create another new layer. Make sure the new layer is above the background layer.
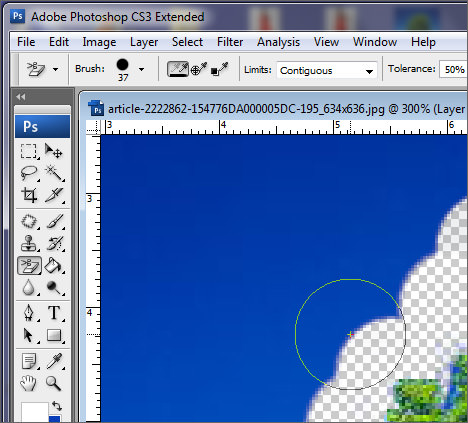
3) Now go to the “tool” panel and select the “brush tool” function.

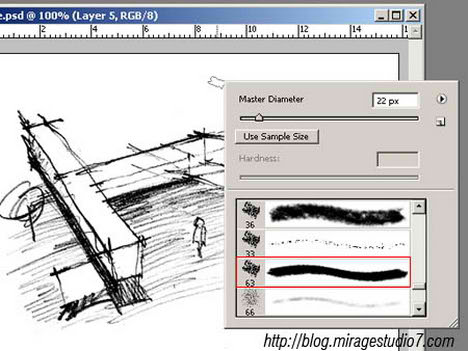
4) After selecting the “brush tool” function, move the mouse cursor to the sketch file, then right click the mouse. Adjust the desire settings, I would recommend using the “Oil Paste Large” brush style; you can always use different brush size depending on the size of your drawings. In my case I choose the diameter of brush size to be 22.
p.s. To determine the brush style, simple point your mouse at the desire layer and wait for a few second, a yellow box will pop-up to indicate the name of the brush style. I’m using Photoshop CS2 and the default brush size for the “Oil Paste Large” is 63.
5) Select the desire green colour then colour it using the brush style selected. Please make sure that you are colouring the “new layer” you’ve created from step two, and not on the background layer.

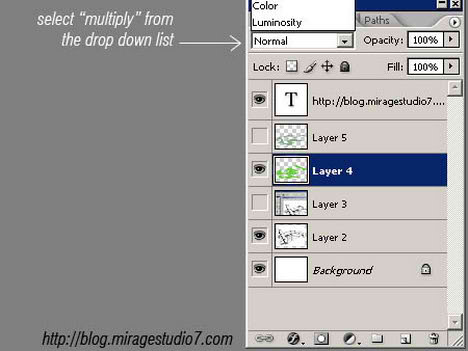
6) When you’re done and happy with your work. Select the “new layer” (based on the image below, its called layer 4) that you’ve colour on it just now and blend it with the background by selecting the “multiply” blending options from the drop down list in the layer panel.
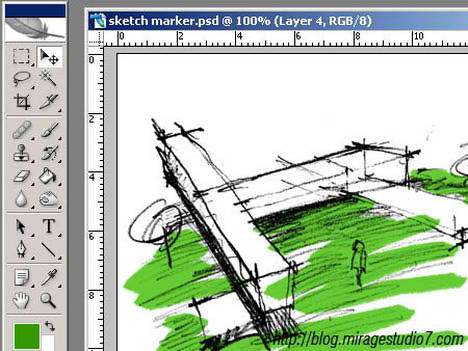
7) The overall colouring should look like the image below after blending it using “multiply” effect, where the green colour blends with the background.
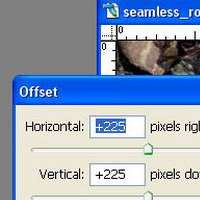
8) Now, select the “new layer” (it’s called layer 4 in my setting, yours would be layer 2 I assume), go to “filters” then choose “brush stroke” and then “spatter”. A new window dialog box will appear, select the desire settings (preferably to leave it default) then click “ok” button.
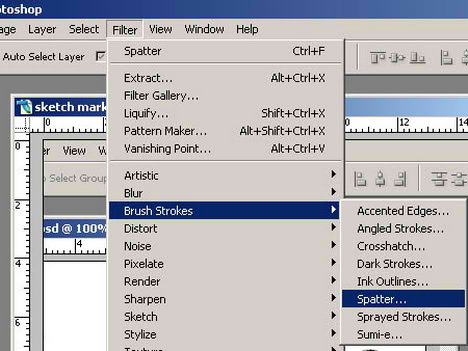
9) By using the “spatter” effect, the brush stroke now has uneven edges and gaps in between. This give a more natural effect.
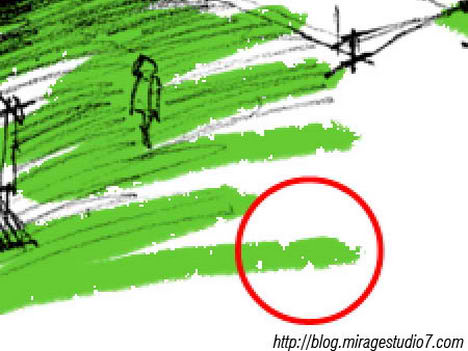
10) Repeat step 2 to 9 for a second time by using different green colour. Note that two green colour would be more than enough as for when you choose the “multiply”, both the layers overlaps each other and just like a normal marker colouring, it produce different tonnage.
There you go; it’s a simple step by step tutorial on colouring digitally. Colouring manually is always a better option as for you are able to control the stroke of the marker, where else colouring digitally require using the mouse as the brush, thus lack the artistic brush stroke. If your budget is tight and don’t want to waste so much money buying up a whole set of marker pens, then try colouring it digitally. Its cheap and best of all, you are able to undo your mistakes.

this is too cool but we need more effects of this
nice tutorial, but the base image is not loaded at all…
the tutorials link’s page isnt show in firefox, and bad showed in g. chrome….
greets
can do it in photoshop not that so impressive
its more easy and better…more natural with piranesi… always you use your wacom