You might find this tutorial useful if your computer is slow. Here is a simple tutorial on how to increase Adobe Photoshop performance.
Method 1
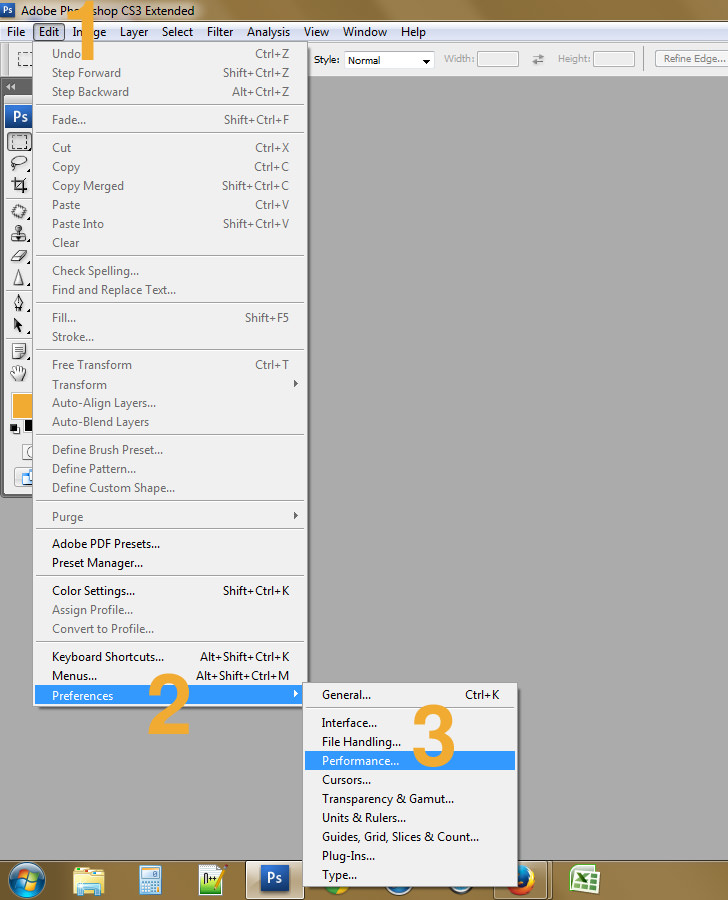
- Step 1 – Go to ‘Edit’
- Step 2 – Select ‘Preferences’
- Step 3 – Select ‘Performance…’

- Step 4 – Choose the ‘Performance’ tab
- Step 5 – Increase the memory. 75% is ideal, anything more than that will slow down Windows.
Method 2
Use ReadyBoost, only available in Windows Vista and 7. You’ll need a USB flash drive or SD Card, preferably one with 2 to 4GB. Note: Doesn’t work on external hard disk, only on flash memory. Make sure the flash drive or SD card is empty.

- Step 1 – Right click on the USB Drive, go to ‘Properties’

- Step 2 – Select the ‘ReadyBoost’ tab
- Step 3 – Choose ‘Dedicate this device to ReadyBoost’, then click the ‘Ok’ button.
These methods will slightly increase the overall photoshop experience and performance, slightly. Very useful when it comes to handling large presentation files in A1 size at 300dpi.